Sunflowers stand out as some of the most vibrant and beloved plants in any garden. Their tall stems and radiant yellow flowers instantly lift the mood of any area, and their seeds serve as nourishment for people, wildlife, and future crops. If you’ve cultivated sunflowers this year and want to relish their charm again next season, saving their seeds is both a fulfilling and economical choice. The method is straightforward, but following a few key steps ensures you harvest healthy, viable seeds ready to sprout come spring. This guide covers everything from selecting the best flowers to proper seed storage, empowering you to plant with confidence when the warm months return.
Why Save Sunflower Seeds?
Before exploring the “how,” consider the benefits of seed saving:
- Budget-Friendly: One sunflower head can produce hundreds of seeds, providing ample supply for next year’s garden without purchasing new seed packets.
- Independence: Saving seeds lessens reliance on commercial seed suppliers, promoting a more sustainable gardening practice.
- Preserve Beloved Varieties: If you have a favorite sunflower type, saving seeds guarantees you can grow the same variety again.
- Share the Joy: Surplus seeds can be exchanged with fellow gardeners or gifted to friends.
- Bird Food: Leftover seeds offer a nutritious winter snack for local birds.
Step 1: Select the Ideal Sunflowers for Seed Saving
Not all sunflowers are suitable for seed saving. Look for these traits:
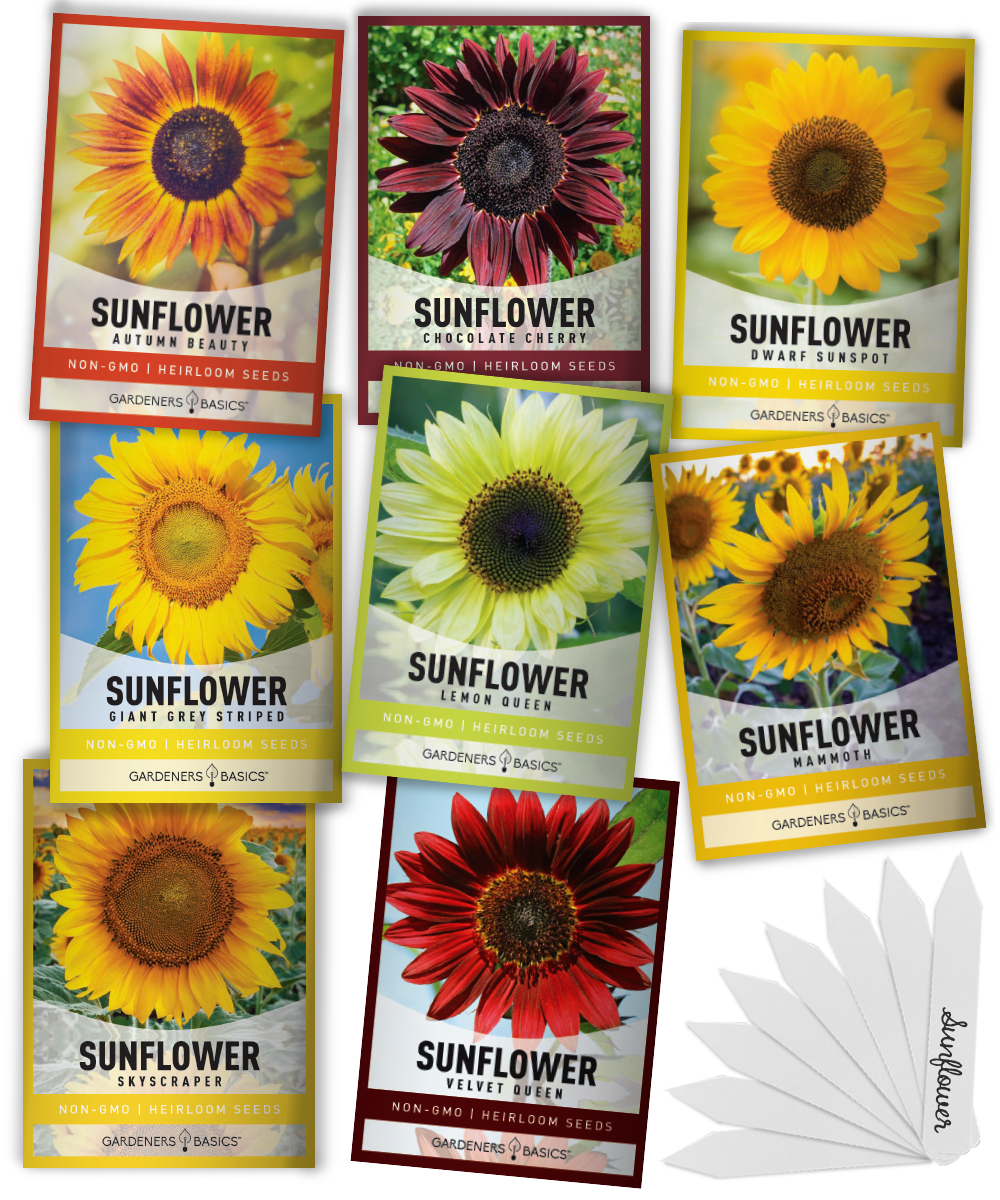
- Open-Pollinated or Heirloom Types: These will reliably produce offspring true to the parent plant.
- Avoid Hybrids: Hybrid sunflowers often yield unpredictable or weaker plants.
- Healthy Specimens: Choose seeds from robust, disease-free plants to ensure seed viability.
Tip: For large seeds ideal for replanting or snacking, consider varieties like Mammoth Russian or Giant Sungold.
Step 2: Let Seeds Fully Mature on the Plant
Patience is key when saving sunflower seeds. Harvesting too soon results in immature seeds that won’t germinate.
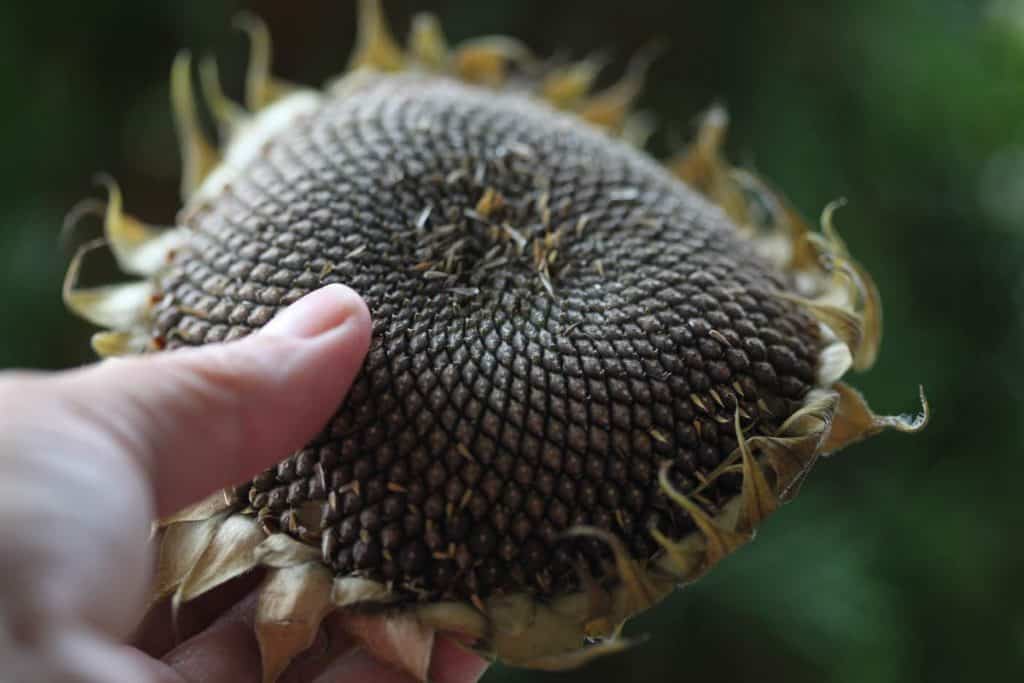
Signs the seeds are ready:
- Flower petals dry out and drop off.
- The back of the flower head changes from green to yellow, then brown.
- Seeds look plump with fully formed shells.
- Birds may begin pecking at the seeds, signaling maturity.
What to do:
- Keep the flower heads on the plant as long as possible to allow full seed development.
- If birds become a nuisance, cover the heads with breathable materials like cheesecloth, paper bags, or mesh to protect seeds without trapping moisture.
Step 3: Harvesting the Sunflower Heads
Once the sunflower heads are completely mature, it’s time to collect them. Use clean, sharp garden shears or scissors to cut the stem about 6 to 12 inches below the flower head. Remove any loose petals or debris by gently shaking the heads. Then, place them in a dry, airy spot—such as a garage, shed, or covered porch—to finish drying thoroughly.
Step 4: Drying the Seeds
Ensuring seeds are thoroughly dried is essential for preserving them over time. To dry, hang sunflower heads upside down or spread them out on screens in a warm, well-ventilated area for one to two weeks. Periodically test the seeds by rubbing them; they should feel firm and detach easily. If they remain soft, extend the drying period. Avoid placing them in direct sunlight indoors, as excessive heat and light can harm the seeds and lower their ability to sprout.
Step 5: Extracting the Seeds
Once the heads are completely dry, gently rub them by hand or use a soft brush to release the seeds. Collect the seeds in a bowl or tray, and remove any leftover plant material. Wearing gloves is recommended since sunflower heads can be rough on the skin.
Step 6: Cleaning the Seeds
Cleaning your seeds improves storage longevity and reduces the risk of mold. Discard any seeds that are broken or shriveled, keeping only those that are plump and healthy for planting. To separate seeds from chaff and light debris, gently blow across them or sift them.
Step 7: Storing Sunflower Seeds Until Spring
Proper storage is just as vital as harvesting. Poor storage can undo your efforts. Follow these guidelines:
- Use paper envelopes or cloth bags instead of plastic, which traps moisture and promotes mold.
- Store seeds in a cool, dry environment, ideally between 32–41°F (0–5°C). Suitable spots include basements, pantries, or refrigerators.
- Clearly label your containers with the seed variety, harvest date, and any relevant notes.
- Avoid freezing seeds, as improper freezing can damage sunflower seeds.
When stored under the right conditions, sunflower seeds can remain viable for 5 to 6 years, though their germination success is highest within the first 1 to 3 years.
Step 8: Testing Seed Viability in Spring
Before planting, check if your saved seeds are still good. Place 10 seeds between moist paper towels, keep them warm and damp for 7 to 10 days, then count how many sprout. An 80% germination rate (8 out of 10 seeds) indicates excellent seed quality for replanting.
Extra Uses for Saved Sunflower Seeds
If you have more seeds than needed for planting, consider these alternatives:
- Feed birds, especially during colder seasons.
- Roast seeds with salt or spices for a nutritious snack.
- Press seeds to extract sunflower oil if you have a large harvest.
- Use dried sunflower heads for rustic fall decorations.
Common Mistakes to Avoid
To maximize your seed-saving success, steer clear of these errors:
- Harvesting seeds before they mature, which results in poor germination.
- Storing seeds in plastic bags that trap moisture and cause mold.
- Neglecting to label seeds, leading to confusion later.
- Leaving sunflower heads outside too long, risking damage from wildlife or weather.
- Failing to dry seeds thoroughly, which can cause spoilage.
Final Thoughts
Saving sunflower seeds is a rewarding and accessible project for gardeners of all levels. With careful attention to timing, drying, and storage, you can enjoy a reliable supply of seeds for many seasons ahead.
Engaging in this habit not only cuts costs but also immerses you in the natural rhythm of planting, harvesting, and renewal. When spring rolls around, you’ll possess your own stash of sunflower seeds, poised to grow into towering, radiant flowers that brighten your garden anew. Mastering the art of seed saving and replanting is a meaningful stride toward eco-friendly gardening, ensuring these beloved sunflowers continue to flourish for future generations.
- Sunflowers’ Appeal: Brighten gardens with tall stalks and golden blooms; seeds feed people, wildlife, and future plants.
- Benefits of Saving Seeds: Cost-effective, promotes self-sufficiency, preserves favorite varieties, enables seed sharing, and provides bird food.
- Choosing Seeds: Select open-pollinated or heirloom varieties; avoid hybrids; pick healthy plants; consider large-seed types like Mammoth Russian.
- Seed Maturity: Wait for petals to dry and fall, head color to shift from green to brown, and seeds to plump; protect from birds if needed.
- Harvesting: Cut heads with clean tools 6–12 inches below; remove debris; dry in a ventilated, dry place.
- Drying: Air-dry heads upside down or on screens for 1–2 weeks; seeds should be firm and loose; avoid direct indoor sunlight.
- Extracting Seeds: Rub heads gently to release seeds; collect and remove plant debris; gloves recommended.
- Cleaning Seeds: Discard broken/shriveled seeds; winnow to remove chaff.
- Storage: Use paper or cloth bags; keep cool (32–41°F); label clearly; avoid plastic and freezing; seeds viable 5–6 years.
- Viability Test: Germinate 10 seeds on moist towels for 7–10 days; 80% sprouting rate is ideal.
- Extra Uses: Bird food, snacks, oil production, crafts.
- Common Mistakes: Harvesting too early, plastic storage, no labeling, leaving heads outside too long, insufficient drying.
- Final Thought: Saving sunflower seeds is rewarding, cost-saving, and supports sustainable gardening and preservation of favorite flowers.